0%

在订阅中显示 Lightsail 流量使用情况

AWS Lightsail 的 VPS,如果流量超额了将会收取更多的费用,需要做一个流量使用情况监控。
想到 Clash 订阅可以显示流量信息,参考 subscription-userinfo,可以实现在订阅链接展示流量使用情况。
使用的方案是 crontab 定期运行脚本,通过 AWS API 获取流量信息,更新数据到 Cloudflare Workers KV 变量,在客户端更新订阅时可以获取到流量信息。

在之前的文章 AWS Lightsail 修改 IP 并更新 DNS 记录 已创建好 AWS 和 Cloudflare 的用户 API 令牌,可以继续使用,但需要修改部分权限。

AWS IAM 用户需要添加 GetInstanceMetricData 权限,以下是示例的 json 数据:

1
2
3
4
5
6
7
8
9
10
11
12
13
14
15
16
17
18
19
{
"Version": "2012-10-17",
"Statement": [
{
"Sid": "VisualEditor0",
"Effect": "Allow",
"Action": [
"lightsail:AttachStaticIp",
"lightsail:GetStaticIp",
"lightsail:ReleaseStaticIp",
"lightsail:SetIpAddressType",
"lightsail:GetInstanceMetricData",
"lightsail:GetInstance",
"lightsail:AllocateStaticIp"
],
"Resource": "*"
}
]
}

Cloudflare 用户 API 令牌中,需要添加 账户 -> Workers KV 存储 -> 编辑 权限:
API 权限

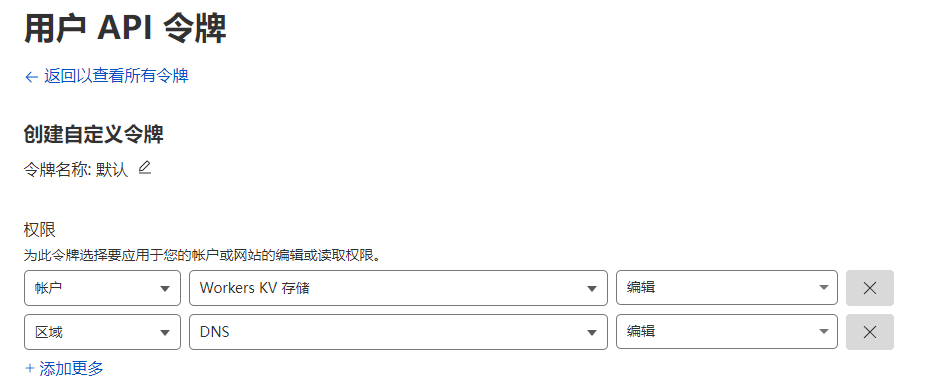
在 Cloudflare 账户主页中,找到 Workers 和 Pages -> KV,创建命名空间。
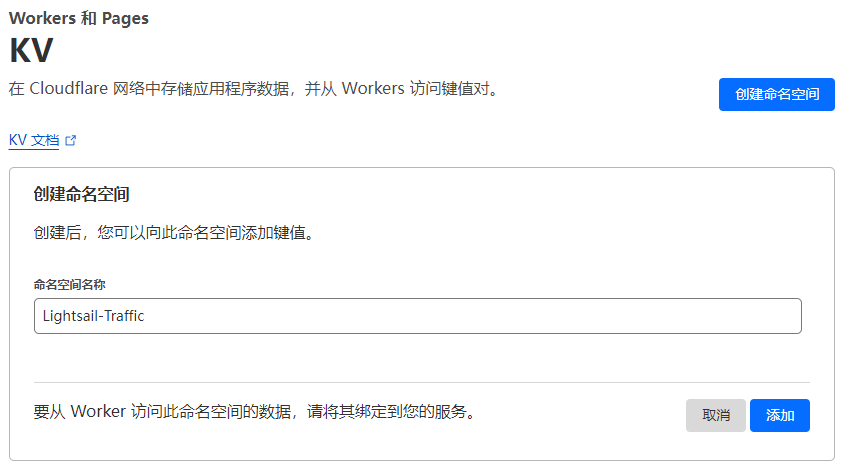
KV 命名空间

流量更新脚本

1
2
3
4
5
6
7
8
9
10
11
12
13
14
15
16
17
18
19
20
21
22
23
24
25
26
27
28
29
30
31
32
33
34
35
36
37
38
39
40
41
42
43
44
45
46
47
48
49
50
51
52
53
54
55
56
from boto3 import client
from botocore.client import Config
from requests import put
from datetime import datetime, timedelta
# 参考了 https://aws.amazon.com/cn/blogs/china/monitor-amazon-lightsail-data-traffic-using-lambda/
Data = {
# AWS API 信息
"vps_name": "vps_name",
"region": "us-east-2",
"access_key_id": "access_key_id",
"secret_access_key": "secret_access_key",
# Cloudflare API 信息
"header": {
"Authorization": "Authorization", # Cloudflare API 密钥
"Content-Type": "application/json",
},
"account_identifier": "account_identifier", # Workers 和 Pages 页的账户 ID
"namespace_identifier": "namespace_identifier" # KV 命名空间 ID
}

aws_api = client(
"lightsail",
region_name=Data["region"],
aws_access_key_id=Data["access_key_id"],
aws_secret_access_key=Data["secret_access_key"],
config=Config(
connect_timeout=3,
read_timeout=3,
retries={'max_attempts': 3})
)

# https://boto3.amazonaws.com/v1/documentation/api/latest/reference/services/lightsail/client/get_instance_metric_data.html
def get_usage(data_type): # 获取一个月的流量信息
dt = datetime.today().replace(day=1, hour=0, minute=0, second=0, microsecond=0) # 获取当月起始时间
res = aws_api.get_instance_metric_data(
instanceName=Data["vps_name"],
metricName=data_type,
period=300 * 12 * 24, # 一天的秒数,300s 是最小统计单位
unit='Bytes',
statistics=['Sum'],
startTime=dt, # 开始日期
endTime=(dt + timedelta(days=32)).replace(day=1), # 结束日期,下月起始时间
)
usage = sum([p['sum']for p in res['metricData']])
print(f"total {data_type} usage: {usage}")
return str(round(usage))

# https://developers.cloudflare.com/api/operations/workers-kv-namespace-write-multiple-key-value-pairs
res = put(f"https://api.cloudflare.com/client/v4/accounts/{Data['account_identifier']}/storage/kv/namespaces/{Data['namespace_identifier']}/bulk",
json=[
{"key": "NetworkOut", "value": get_usage("NetworkOut")}, # 获取对应的流量统计信息,写入 KV 命名空间里的键值
{"key": "NetworkIn", "value": get_usage("NetworkIn")},
],
headers=Data["header"]
)
assert res.status_code == 200, f"流量更新错误:{res.text}"

将密钥信息明文存储在脚本内是非常危险的行为!
执行脚本后,可以获取到本月 Lightsail 流量的使用情况,这里获取的统计信息会比账单里更新的要快。流量数据会被更新到 Cloudflare Workers KV 命名空间里的 NetworkOutNetworkIn
因为是个人用,并不需要太频繁的更新,且考虑到 API 和 KV 读写的限额,在 Lightsail VPS 里配置 crontab 任务,每 4 小时执行一次更新。

流量数据更新到 Cloudflare Workers KV 后,需要在 Cloudflare Workers 的订阅里调用这部分数据。
使用 Workers 制作订阅链接并追踪访客 IP 里的脚本修改如下。

订阅链接脚本

1
2
3
4
5
6
7
8
9
10
11
12
13
14
15
16
17
18
19
20
21
22
23
24
25
26
27
28
29
30
31
32
33
34
35
36
37
38
39
40
41
42
43
44
45
46
47
48
49
50
51
52
53
54
55
56
57
58
59
60
61
62
63
64
65
// 默认节点信息
const DummyData = `
ss://[email protected]:443#example1
ss://[email protected]:443#example2
`

const UserList = [
'user_1',
'user_2',
'user_3'
]

async function sendMessage(env, type, ip, add_data = "") { // 通过 tg bot 发送提醒
let msg = "";

const response = await fetch(`http://ip-api.com/json/${ip}`);
if (response.status == 200) { // 查询 IP 来源信息,使用方法参考:https://ip-api.com/docs/api:json
const ipInfo = await response.json();
msg = `${type}\nIP: ${ip}\nCountry: ${ipInfo.country}\nCity: ${ipInfo.city}\n${add_data}`;
} else {
msg = `${type}\nIP: ${ip}\n${add_data}`;
}

return fetch(
`https://api.telegram.org/bot${env.tg_bot_token}/sendMessage?chat_id=${env.tg_chat_id}&text=${encodeURIComponent(msg)}`,
{
method: 'get',
headers: {
'Accept': 'text/html,application/xhtml+xml,application/xml;',
'Accept-Encoding': 'gzip, deflate, br',
'User-Agent': 'Mozilla/5.0 Chrome/118.0.0.0'
}
}
);
}

export default {
async fetch(request, env) {
const url_tag = new URL(request.url).searchParams.get('user_tag');
if (!url_tag) {
return new Response(null, { status: 404 });
}

let req_data, response;
if (UserList.includes(url_tag)) { // 如果 url_tag 的值在 UserList 列表里
switch (url_tag) { // 这里可以根据不同 url_tag 返回不同的内容
default:
response = new Response(btoa(DummyData));
// https://docs.gtk.pw/contents/urlscheme.html#subscription-userinfo
// subscription-userinfo: upload=455727941; download=6174315083; total=1073741824000; expire=1671815872
response.headers.set( // 设置 subscription-userinfo 展示流量信息和过期时间,过期时间 expire 实时生成
'subscription-userinfo',
`upload=${await env.kv.get("NetworkIn")}; download=${await env.kv.get("NetworkOut")}; total=${env.sub_total}; expire=${Math.floor(Date.now() / 1000 + 604800)}`);
break;
}
} else { // 如果未找到 user_tag 参数,则随机生成一些无意义数据
let bytes = new Uint8Array(Math.floor(Math.random() * 100) + 700);
crypto.getRandomValues(bytes);
response = new Response(btoa(String.fromCharCode.apply(null, bytes)));
}
// 传递访问者 IP 到 sendMessage 函数,用于发送通知
await sendMessage(env, "#Update", request.headers.get('CF-Connecting-IP'), `User: ${url_tag}`);
return response;
},
};

脚本里不再存储 tg bot 密钥等信息,改用 Workers 的变量功能提供:
Workers 变量

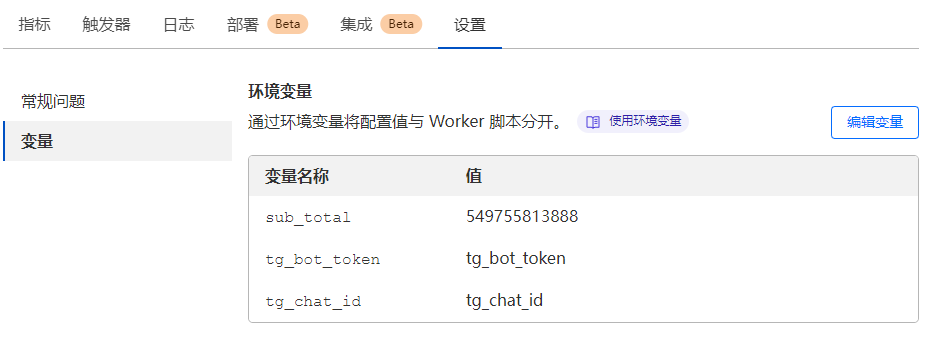
将之前创建的 KV 命名空间绑定到 Workers 后,可以通过 env.kv.get("keyname") 使用:
Workers KV

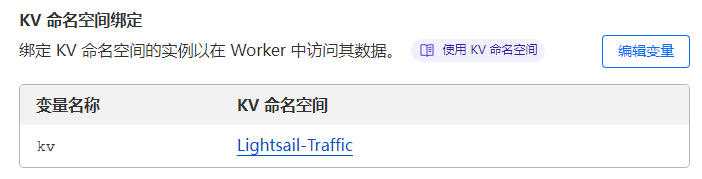
变量配置完成后,更新订阅就可以获取到已用流量信息了。